When I made the decision that I was going to go and try to see mountain gorillas, I did a ton of research online. I looked at reviews of treks in both Uganda and Rwanda and in the end, on the advice of my travel agent, went with a Uganda based itinerary. All the research in the world doesn’t make up for actually being there, as no matter how many photos you see or stories you read, you won’t know how it feels until you experience it yourself. I have been wanting to create some posts around my gorilla tracking experience for some time, mostly as an opportunity to share some photos and video clips, but also as an opportunity to share my experience.
I’m breaking this up into 3 parts; Planning and Gear, Trekking Day and Photo Considerations.
Planning & Gear
I have used a South African based travel agent, Rhino Africa, for all my adventures into Africa. When I decided that gorillas were going to be my next adventure, I got in touch with Rhino and they had one of their East Africa specialists work with me to come up with the itinerary that I wanted. As a solo traveller, it can be a little tricky, as the tour that I wanted to do would only run with a minimum of two people. My travel agent found a date when other people had already booked, and I jumped onto that tour. I booked a 10 night itinerary through Uganda run by Wild Frontiers. The tour started and ended in Entebbe, and took in Bwindi, Ishasha, the Kazinga channel, Kayburo Gorge and Kibale Forest.
Booking with a set, guided tour made the process incredibly easy. They took care of the trekking permits, airport pickups, all the accommodation and food. I basically just had to show up and enjoy myself, which is something I really like on holiday. I would rather do all the planning and thinking in advance, and then be able to enjoy myself when I am some place new and exciting.
I was very nervous during the planning and preparation stages of my trip; this was an adventure into the unknown I was worried that I wouldn’t be able to handle it physically. While I wasn’t the absolute last to be picked in gym class back in the day, I wasn’t far from it. My trip left on August 31st, and I spent the 8 months prior to leaving really focusing on improving my conditioning to the best of my ability. I already walked a fair bit, but I added in hills at least once a week, some time on my bike and other strength training.
I decided very early on that I wanted to do two gorilla treks, since the time we had allotted in Bwindi allowed for that option. I had my travel agent coordinate the second gorilla trek permit approximately 8 months in advance of the trip; if you are going on an adventure like this, definitely make sure to coordinate all your permits well in advance. There were 7 on our tour, and only 2 of us had pre-booked the second day trekking. The balance of the group did try to purchase permits last minute, but all 24 available permits for the day were already sold.
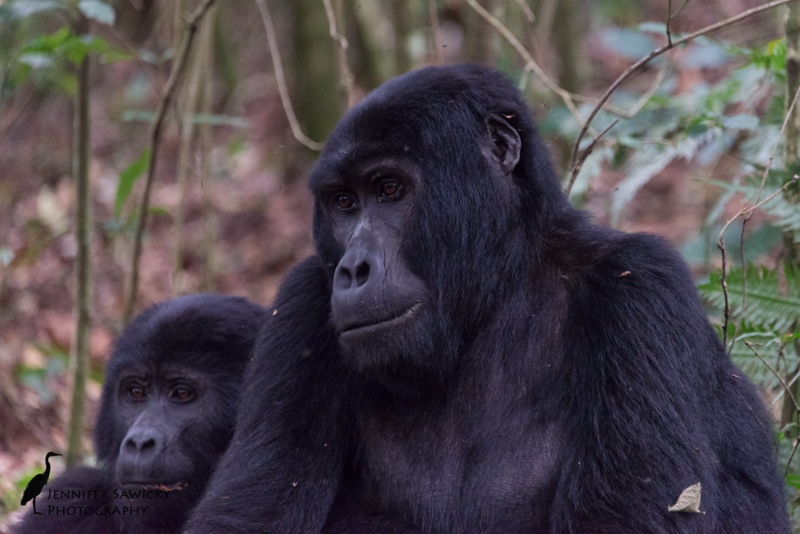
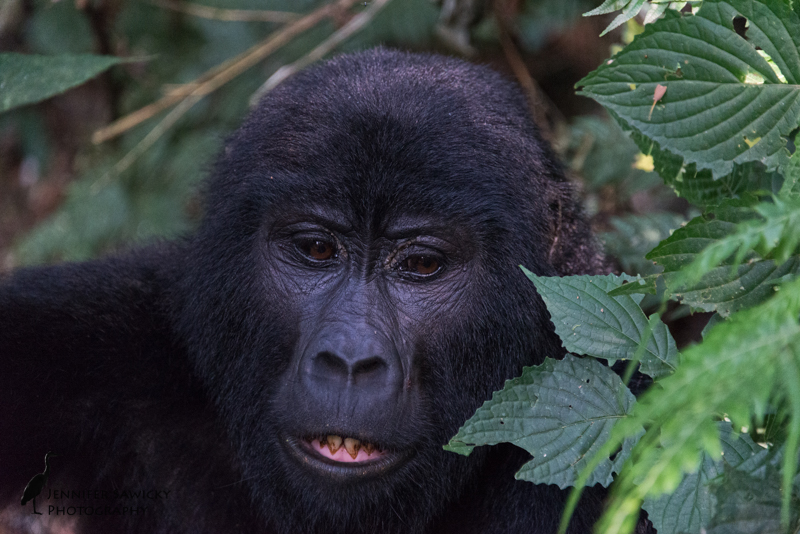
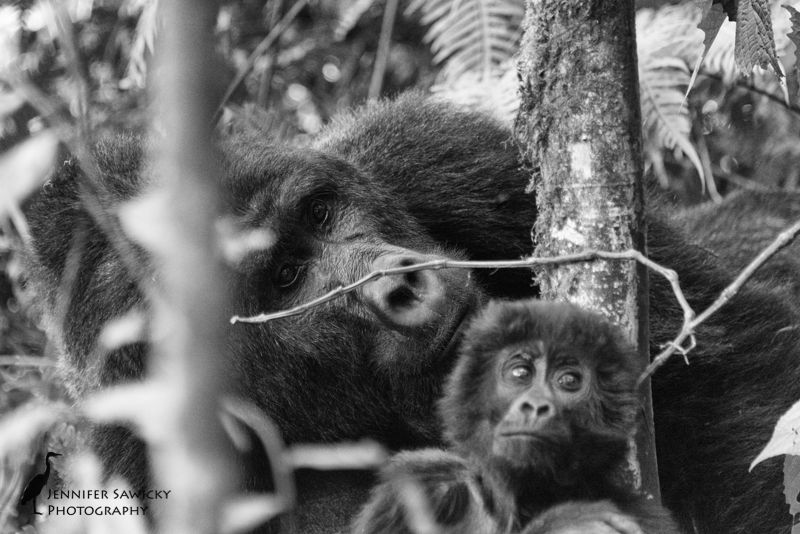
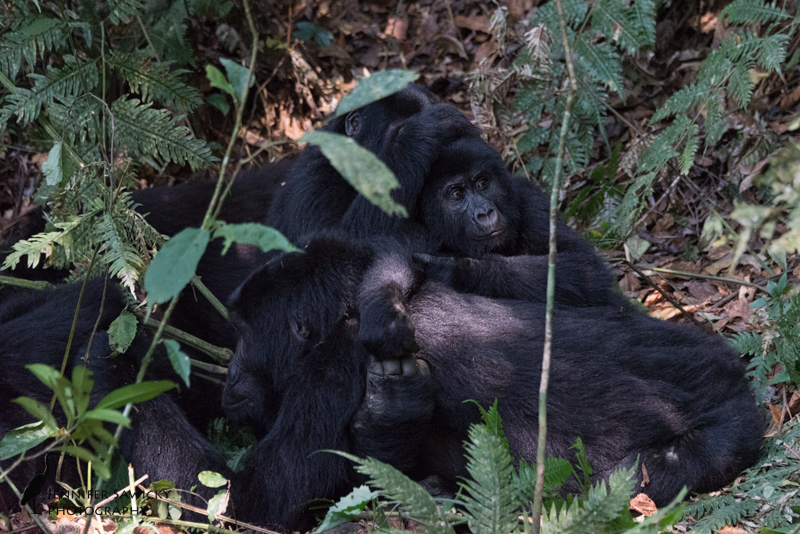
In the Buhoma region of Bwindi there are 3 habituated gorilla families that can be viewed, and while there are no guarantees where each family will be on a given day, they do have typical territories. I asked in advance to go to see the group that would be the least strenuous walk, as even with the planning, I was still worried that I wouldn’t be fit enough and didn’t want to be holding my group back. The tour group I was with had a couple other people with various injuries and conditions, so in the end, we all asked for the easiest group and were accommodated. But, I went to see the same group the second day, and the experience was completely different (more on that later).
The majority of the articles and blog posts I read prior to my trip mentioned good, study hiking boots for the gorilla trekking, and one suggested bring rubber boots. While the rangers, trackers and porters all tend to wear the latter, I would suggest that hiking boots are the way to go unless you are used to walking up and down hills in rubber boots. I found the stability of the hiking boots to be incredibly beneficial, especially when we started having to trek through very thick forest with difficult footing. I made sure to get waterproof hiking boots in case I needed to cross any streams or trek during the rain. But while you are thinking about your footwear, don’t forget about socks. I spent some time discussing socks with a coworker that is an avid hiker, and on her recommendation picked up some lightweight wool hiking socks for the trip (which have quickly become some of my favourite pairs). Regardless of material, make sure that you have socks that are long enough to tuck your pant legs into, as there is a good likelihood you will come across safari ants during your walk, and that is the best way to keep them from marching up your legs and biting you.
Due to all the thorns and branches, it is recommended to wear long sleeves as well as long pants. I would suggest to pick the materials wisely, as the long sleeve top I took was made of some type of synthetic material that didn’t breathe well, and was quite hot to wear. Some people had gaiters for the trek, they weren’t something I owned and I decided not to purchase them just for the trip. A hat, a poncho or a packable raincoat are good to have as well. One of the best tips that I read was to take a pair of gardening gloves, as the leather palms offer some protection if you need to grab branches (or the ground) to steady yourself. They are definitely an item I would recommend to take along. The lodge I stayed at had a few pairs available to borrow, but there are no guarantees. They also had walking sticks that could be borrowed, and while I hadn’t used trekking poles or walking sticks before, I found them really helpful when going up, but more especially downhill.
I took both my Nikon camera, a GoPro camera that I had a head mount for, and a back up camera in my backpack. If you are taking a second camera and want to have it with you at your sighting, make sure to get it out of your bag, as all backpacks are left with the porters prior to getting to the gorilla sighting. Also, if you are taking a larger camera like a DSLR, a harness might be worth considering. I purchased one prior to my trip and was so grateful for it on walking safaris and on my trek. It not only took the weight off my neck, but more importantly, it kept the camera from bouncing. There are tons of different types available, I chose this one as it was lightweight, small for packing, and made in Canada.
Here’re a few clips from my GoPro from the two days of trekking. I’m the first to admit it’s pretty crappy as I had the camera on while I was busy taking photos (or walking), but it does give a different perspective to the experience.
You can find part 2 here.
You can find part 3 here.
Please visit:
www.jennifersawickyphotography.com for wildlife, landscape and nature inspired artwork.
and
https://shopvida.com/collections/voices/jennifer-sawicky for textiles inspired by my photography.